How to Add Footnotes to Your WordPress Posts

Footnotes are commonly used in all kinds of articles, whenever it is necessary to provide sources, set a wider context, or add more clarity. They are typically placed at the bottom of an article and apart from their primary role, they also help you establish credibility and give your website a more professional and trustworthy image. While they are usually used in posts, footnotes can also be added to any piece of textual content on your website that needs more explanation.
For those who usually write longer and more complex blog posts, finding an easy way for adding footnotes makes writing a lot more simple. Therefore we will show you how to quickly and effortlessly add footnotes to your WordPress posts with a free WordPress plugin.
In this tutorial you’ll learn about:
The Modern Footnotes plugin is a lightweight and extremely user-friendly tool that allows you to add elegant footnotes with complete ease. It simply adds a Modern Footnotes button either to the Gutenberg or Classic editor, so practically all you need to do to add a footnote is just click that button. It is entirely free and optimized both for desktop and mobile devices. On desktop, the footnotes appear as a tooltip when the user clicks on the footnote number, while on mobile, they expand as a section below the current text. Now let’s see how to use the plugin on your WordPress website.
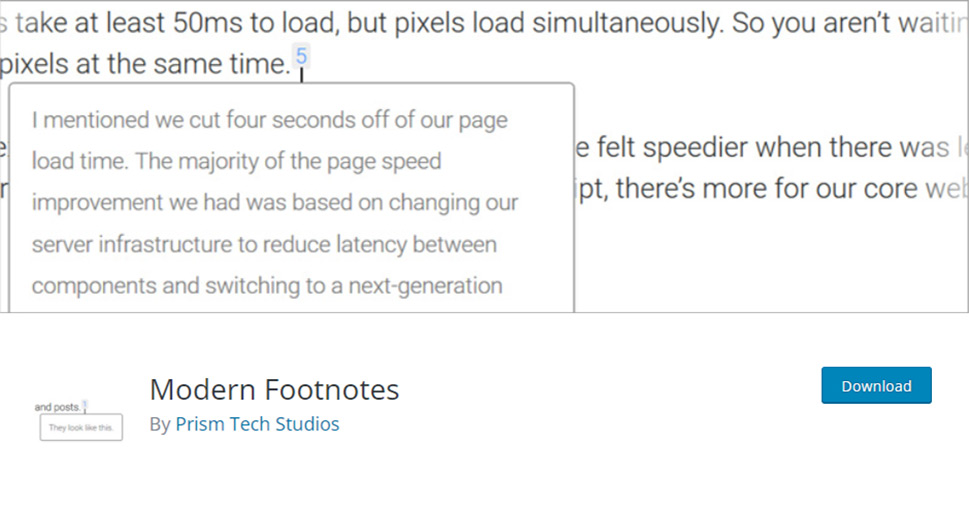
The installation of Modern Footnotes is no different from the installation of any other WordPress plugin.
After you install and activate the plugin, click on the Settings menu and choose the Modern Footnotes option in the left-hand admin panel to open the plugin’s settings.
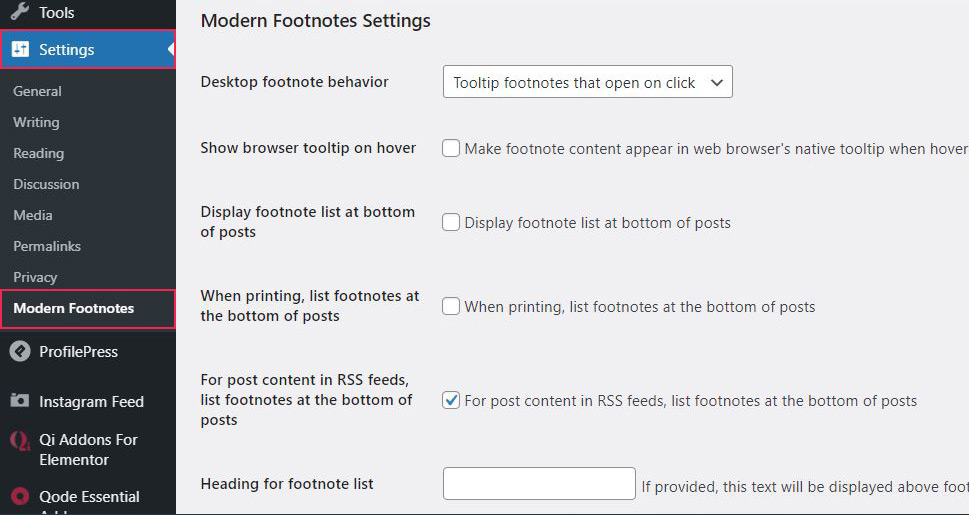
There are a few settings to configure, but it is no big deal if you skip this step because you can get back to it at any point. Let’s just briefly explain the options in the settings:
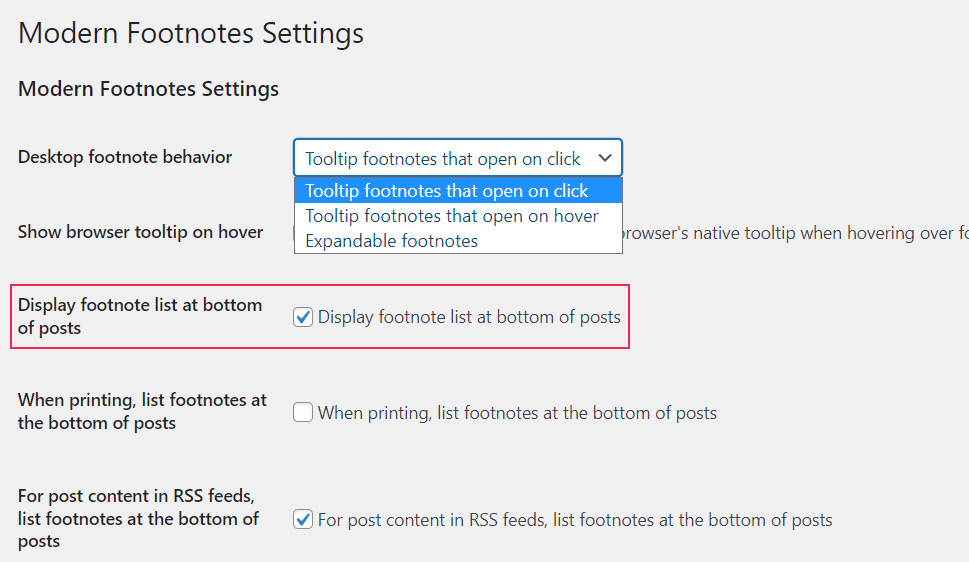
In the Desktop Footnote Behavior dropdown, you can choose whether you want the footnote to be displayed by clicking on the footnote number or by hovering over it. The Expandable footnotes option is usually used on mobiles and you can select it if you want the footnotes to behave on desktop as they do on mobile devices.
If you want the footnote to appear in the web browser’s native tooltip upon hovering over the footnote number, then you should check the Show browser tooltip on hover box.
If you want the footnotes to also appear in the list at the bottom of the article you need to tick the Display footnote list at bottom of posts option in the Settings.
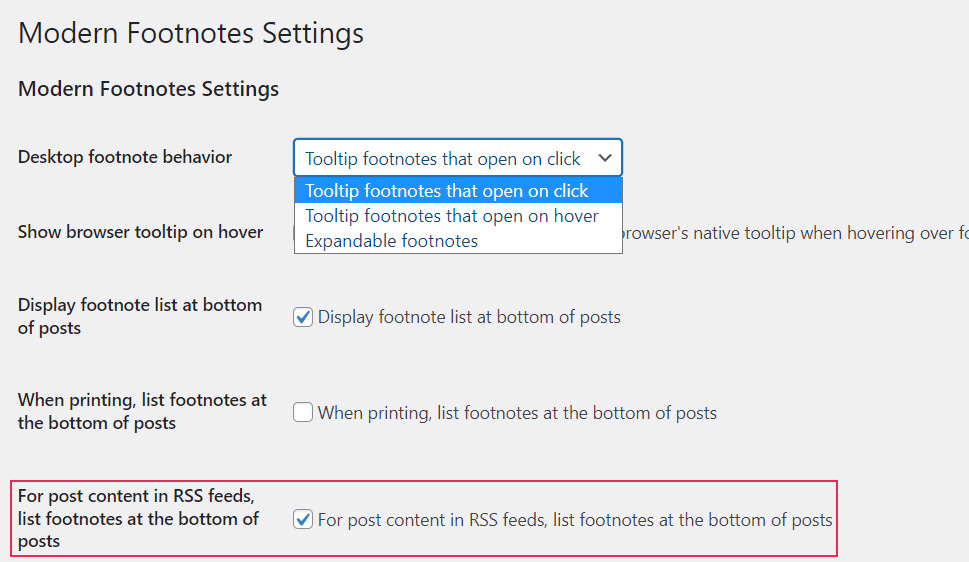
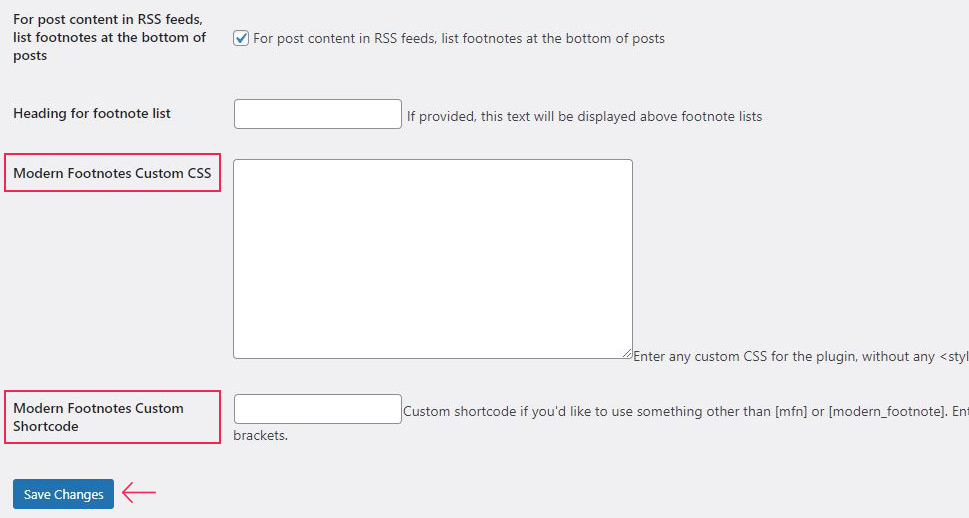
The next three options are of practical nature – you can set the footnotes to always be listed at the bottom of the text when printing, and also you can set them to be listed at the bottom of posts for post content in RSS feeds. Sometimes, when you want to drive special attention to the footnotes, it is a good idea to add a heading for the footnote list. The Modern Footnotes plugin offers the option for that too, you simply enter the desired heading in the assigned field and it will show up above the footnote list on the page.
The plugin offers a few more customization options for those who have some coding knowledge. The option for adding custom CSS is useful in case you want to customize the footnotes design to match your website style better. And in case you want to avoid using the shortcode provided by the plugin, you can create your own custom shortcode and use it instead.
After you are all set here, don’t forget to click Save Changes.
Now, let’s see how to add footnotes using both Gutenberg and the Classic Editor.
The process of adding footnotes in Gutenberg may seem confusing at the start, but it’s really simple once you get the hang of it. What is confusing is that you actually write the footnote in the text after the word where you want the footnote to be displayed. Then you select the word or phrase you wrote and click on the Add a Footnote option. This looks a bit puzzling in the editor but perfectly fine on the frontend.
In our example, we wanted to add the footnote that contains the word “Gutenberg” to the text “famous WordPress editor.” So we wrote and selected “Gutenberg” right after “editor” and then clicked the Add a Footnote option.
Now, let’s see, step by step, how this is actually done. Go to any page or post, write and select the text that you want to be contained in the footnote (which is “Gutenberg” in our case) right after the word you want the footnote to refer to. Then click on the small arrow in the menu and select the new Add a Footnote option.
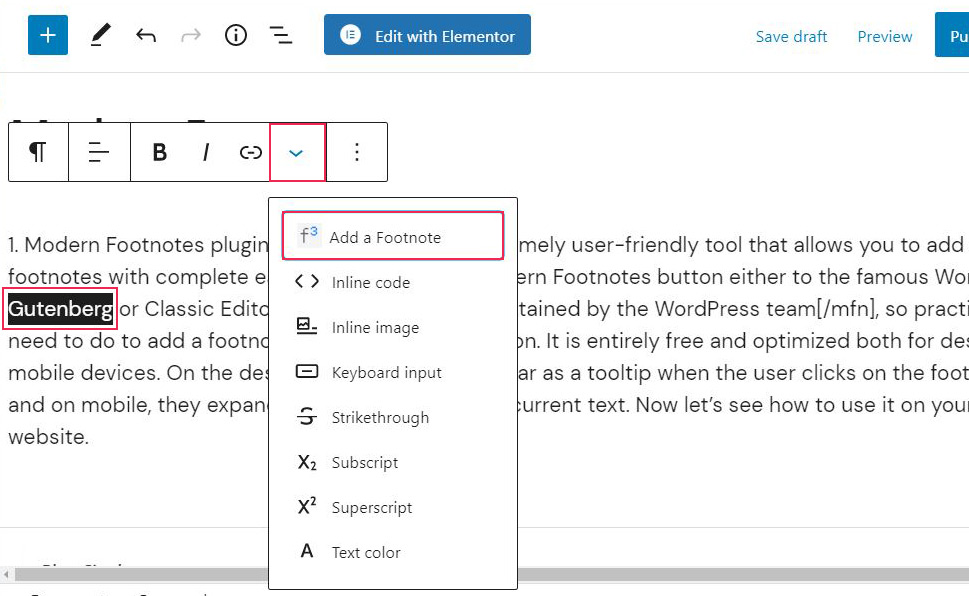
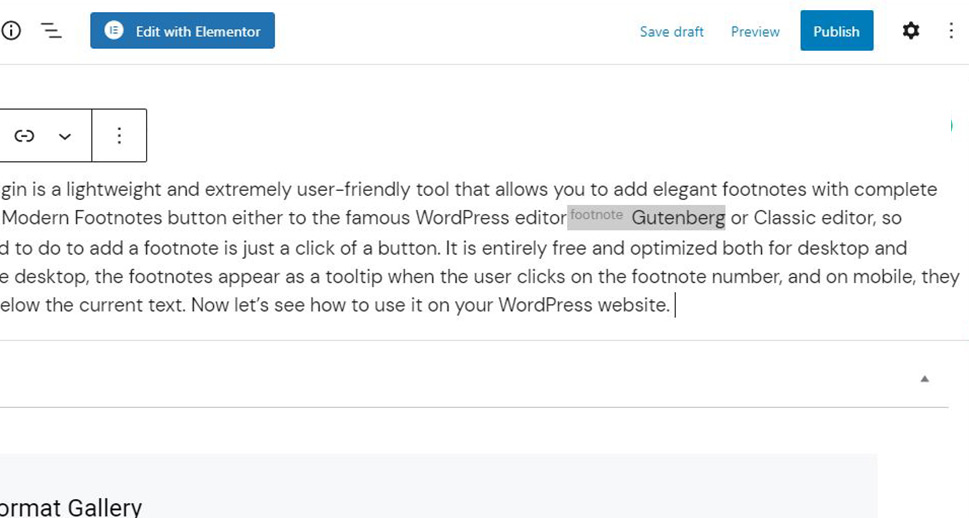
This is how the process looks like in the editor after you clicked the Add a Footnote option:
And this is how it looks on the frontend:
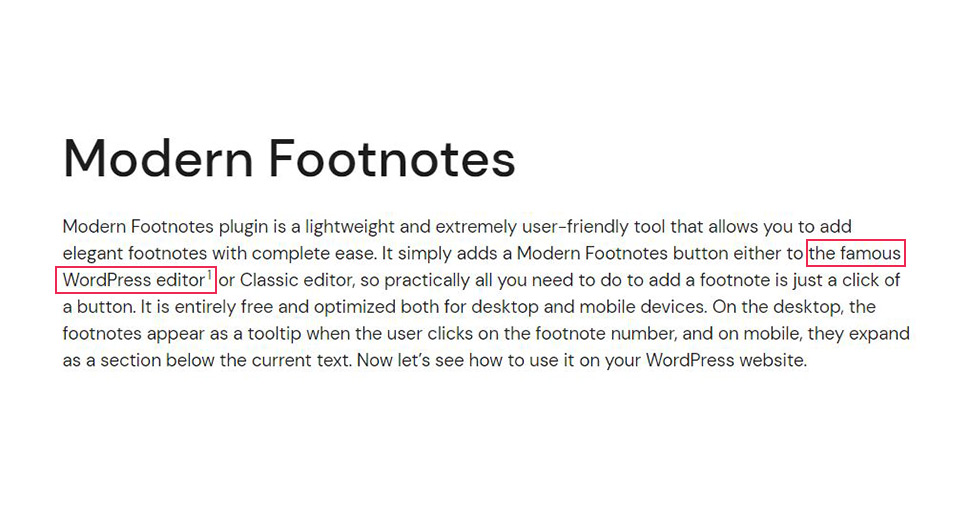
When the user clicks on the footnote number, the footnote will be displayed like this:
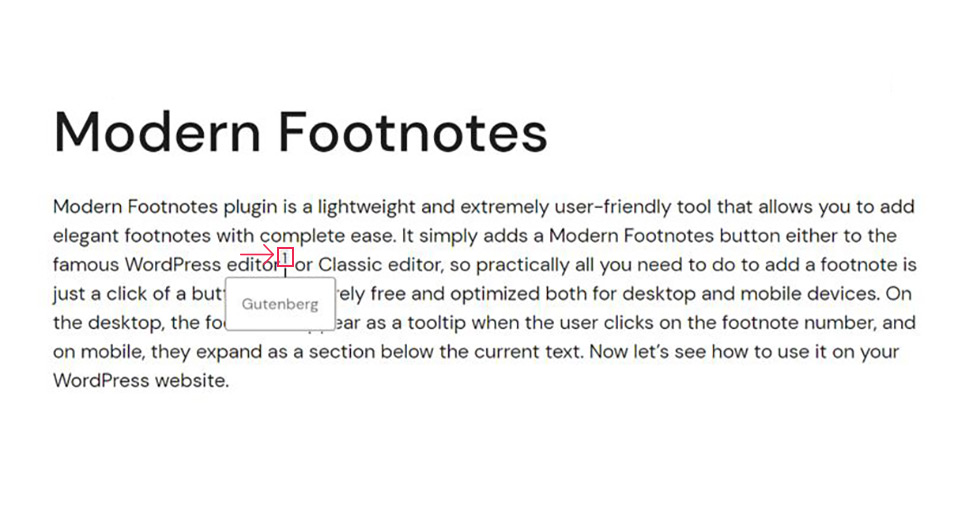
Although finding the “Add a Footnote” option for the first time can be tricky with Gutenberg, everything else is incredibly simple. It is possible to add a footnote to any text block in Gutenberg.
Finding the Modern Footnotes button in Classic Editor is very easy. Go to your post and simply check the formatting menu above the text. You will notice the new button easily. The rest of the process is pretty much the same. You select the text that you want to be contained in the footnote and then simply click the button. The only difference is that the footnote in Classic Editor is wrapped in a shortcode, while in Gutenberg you actually see the word footnote in front of the footnote text.
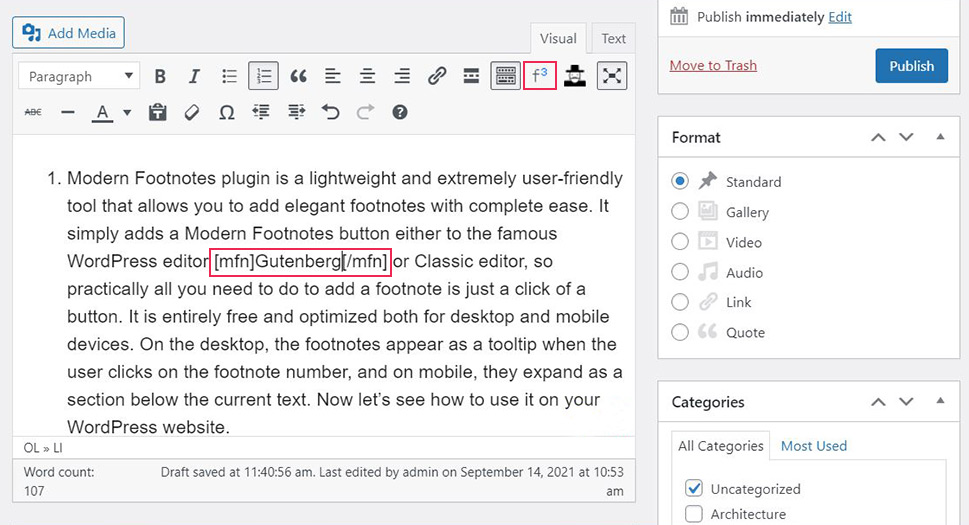
What’s also different in the Classic Editor is that it gives the possibility to insert a footnote without writing it directly in the text. To insert a footnote this way, you just have to click anywhere in the text where you want the footnote to be without selecting any text, and then click the Modern Footnotes button. The option to insert a footnote will appear:
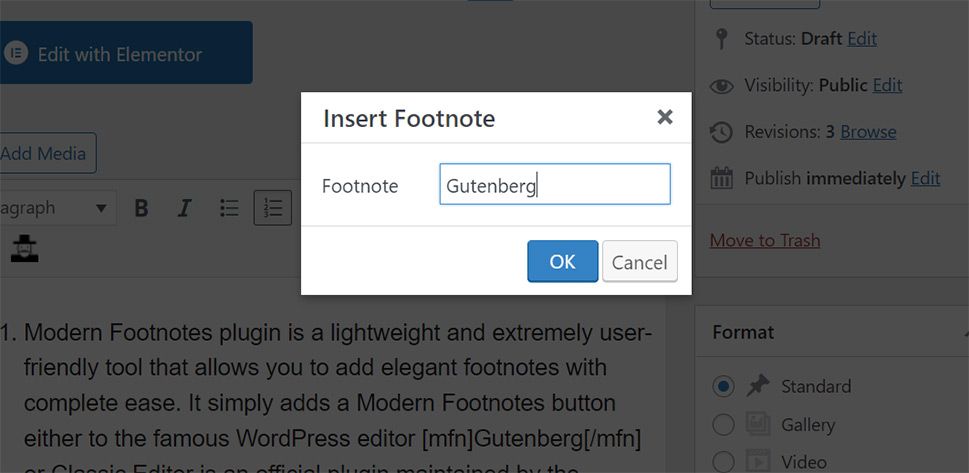
Simply enter the content of the footnote and click ok.
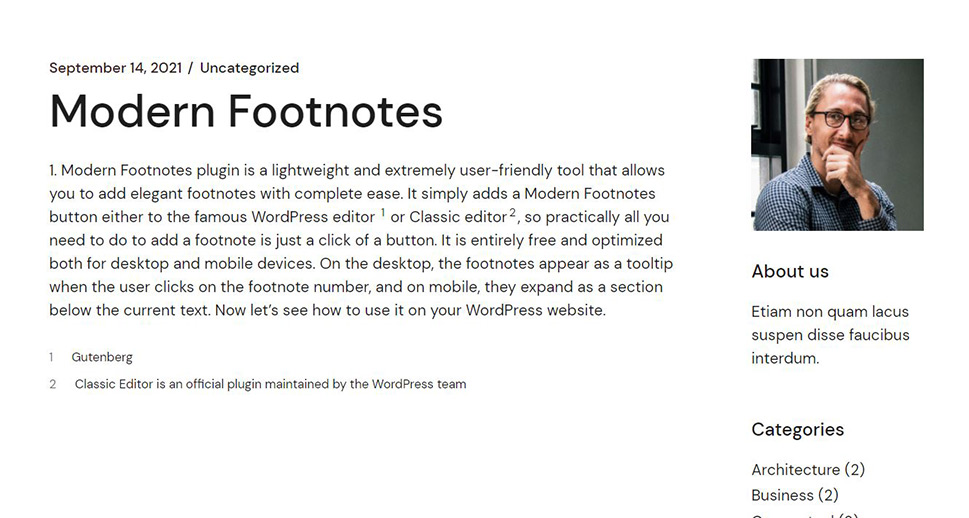
And that’s about it. The footnotes will be automatically enumerated so you don’t have to worry about that. If you selected the option for footnotes to be listed at the bottom of the text, then this is how they will look on the page.
In Conclusion
Footnotes are definitely not necessary on every website. Especially since many blogs utilize basic hyperlinks for sharing sources or other relevant information about the content. Footnotes are useful in all those cases when you are dealing with a lot of scientific data and when rules of practice demand the proper use of footnotes. Another, not so obvious reason to use footnotes is to have fun – make the content more entertaining. There are plenty of good examples when footnotes are used in a humorous way and that is perfectly acceptable too if it fits the style and purpose of your website.


