How to Show Twitch Status and Embed a Stream in WordPress

Do you remember when video-gaming was a niche hobby? That can hardly be said to be the case anymore. Gaming is a massive industry and the mainstream of entertainment, so it’s little wonder that there is a dedicated streaming platform for people interested in gaming and watching other people play and comment on games: Twitch. Twitch streams are accessible online, but there are also ways of integrating them with WordPress and even embedding Twitch streams into your WordPress website.
So, if you wish to provide your visitors with easy access to a particular Twitch stream, you are in the right place. But let us take a step back: why would you want to do that, anyway, and how can you integrate it into your WordPress website? Here’s what we’ll be talking about:
In most ways, Twitch is an online video streaming service just like any other. What sets it apart is its focus on the live streaming of video games. It is as much of a social network now as YouTube is, providing viewers worldwide with game streams and other gaming related content. Since its acquisition by Amazon in 2014, Twitch has grown massively in terms of viewers per month, monthly active users and broadcasters.
Like it or not, Twitch is the premier channel for video game streamers at the moment. Whether you are in the business of video games or you simply want to showcase a hobby, you can benefit from integrating your WordPress website and Twitch.
As of 2016, Twitch has introduced sales links to streams, allowing streamers to monetize their channels through sales commissions, effectively making it easy to stream games as a business. This also means that there is now a clear commercial incentive for link-building between WordPress websites and Twitch streams, too.
Let‘s say you want to let your website visitors know when you‘re streaming on Twitch. You can do that easily using a plugin. The plugin we will be using is Stream Status for Twitch. It is very easy to set up, all you really need is a channel name.
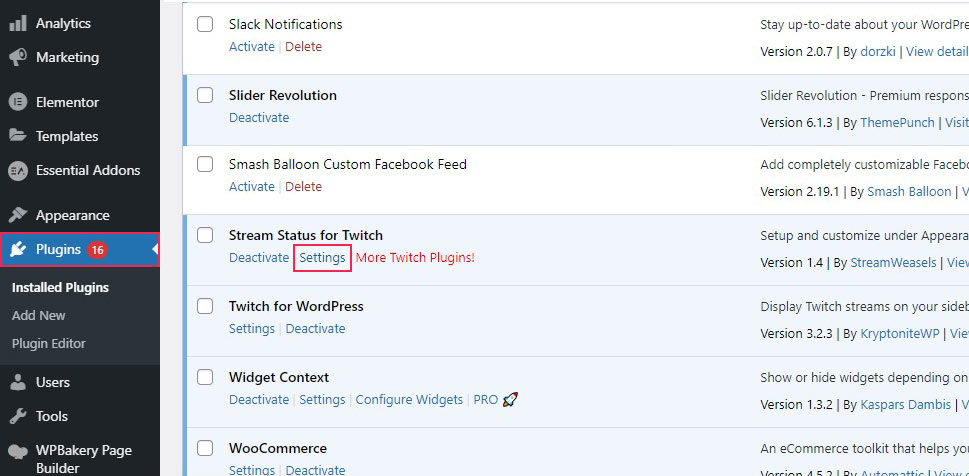
After having installed and activated the plugin, find it on the Plugins screen and click on the Settings link.
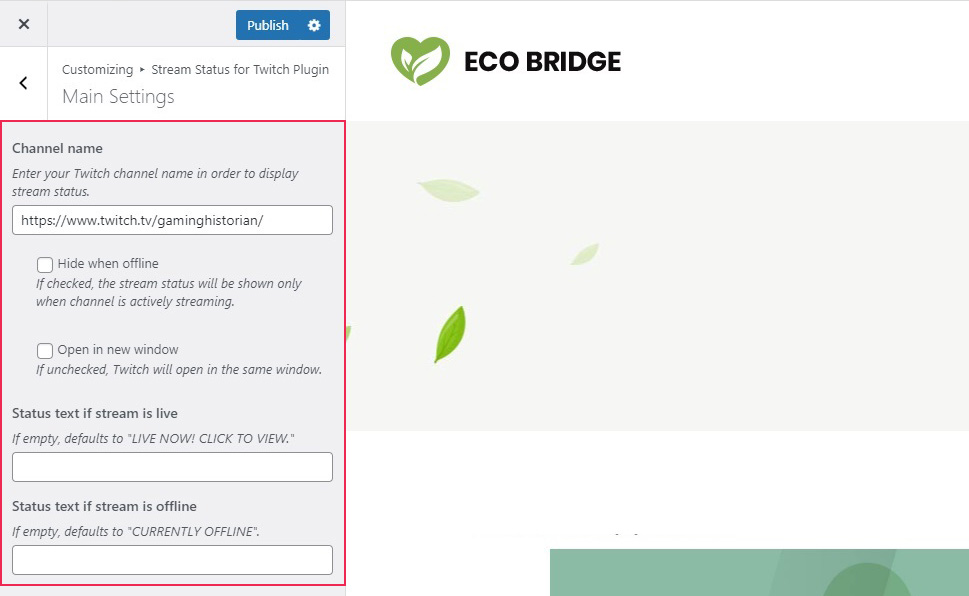
This is where you can customize the plugin’s appearance. In the plugin‘s Main Settings, enter the name of the channel you wish to link to. With that, you are good to go: you should be seeing the widget in the bottom right of the screen. This plugin still allows you some customization options, though.
On this screen, can also check Hide when offline to show the widget only when the streamer is streaming, check Open in new window to open the stream in a new window, and change the status text if a stream is live or online.
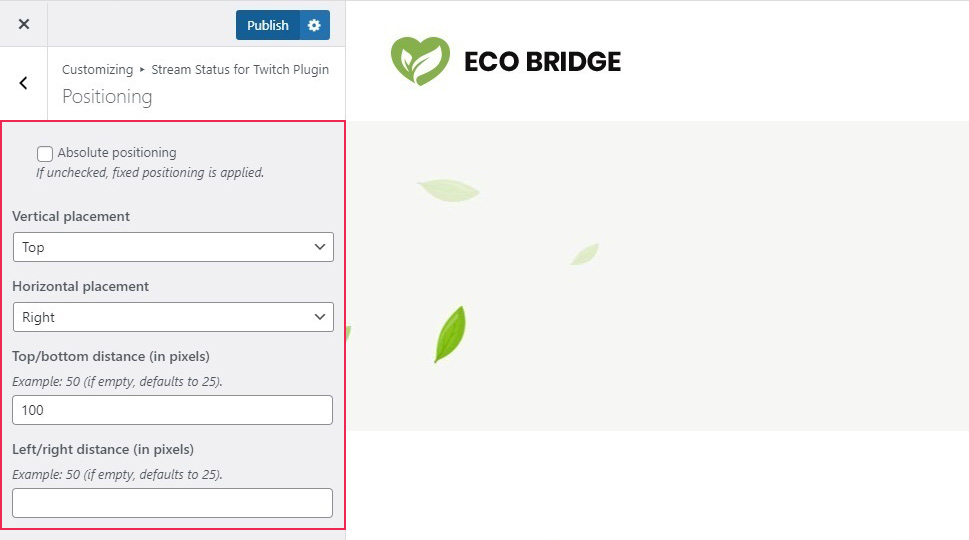
The Positioning options are used to set the position of the floating button. Checking Absolute positioning will keep the button in its position on the website, while by default it floats regardless of how you scroll. The Vertical and Horizontal placement menus allow you to change the positioning of the buttons in general terms, while the Top/bottom and Left/right distance fields let you fine-tune it in relation to the edge of the screen.
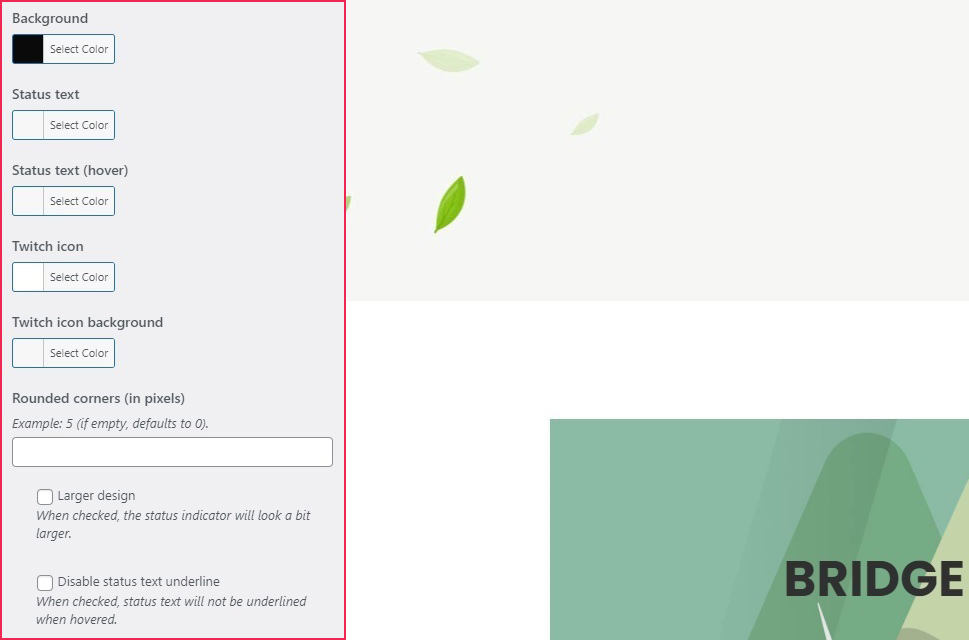
The Customization settings govern the look of the floating button itself, including the colour options and corner roundness. You can also choose a Larger design if you want to make your widget larger in or Disable status text underline on mouse hover.
Finally, in the Misc options you can check Disable appearance animation in case you want a plain floating button, and set screen resolutions for which the widget does not appear.
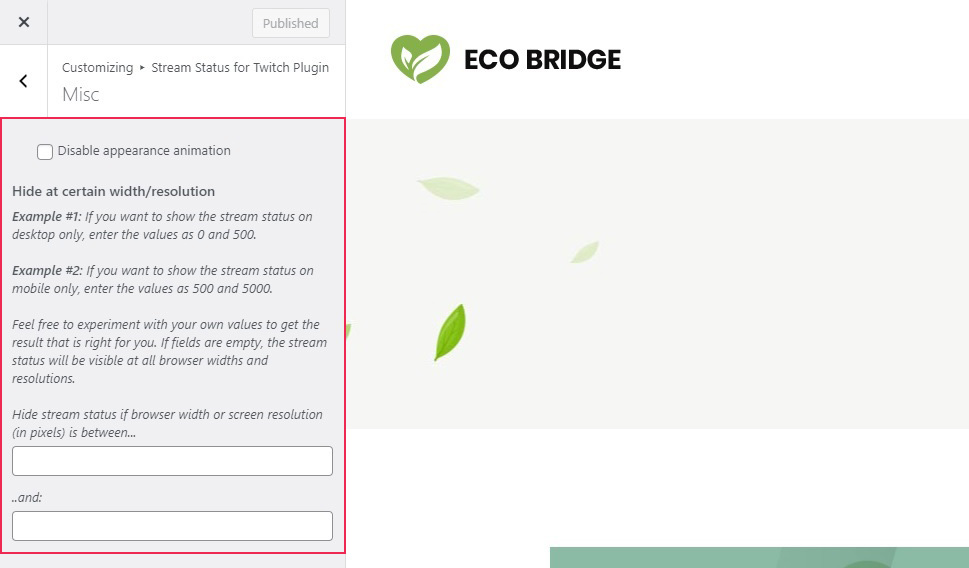
And there you have it, your button will appear for all your website visitors.

If you want to embed your Twitch stream, though, you will need to do some extra work and a different plugin. For this, we will be using Twitch for WordPress. After having installed and activated the plugin, you will still need an API key to make it work. You will need a Twitch account and also to Set Up Two-Factor Authentication in your Twitch accounts security settings. Twitch is very mindful of security, and the exact steps you need to take may vary with regards to email accounts and devices you may be using. Follow the prompts on the screen and you should be fine.
You can find the instructions for creating a Twitch API in the plugin‘s settings themselves. But don‘t worry, we will take you every step of the way once you have set up and configured your account.
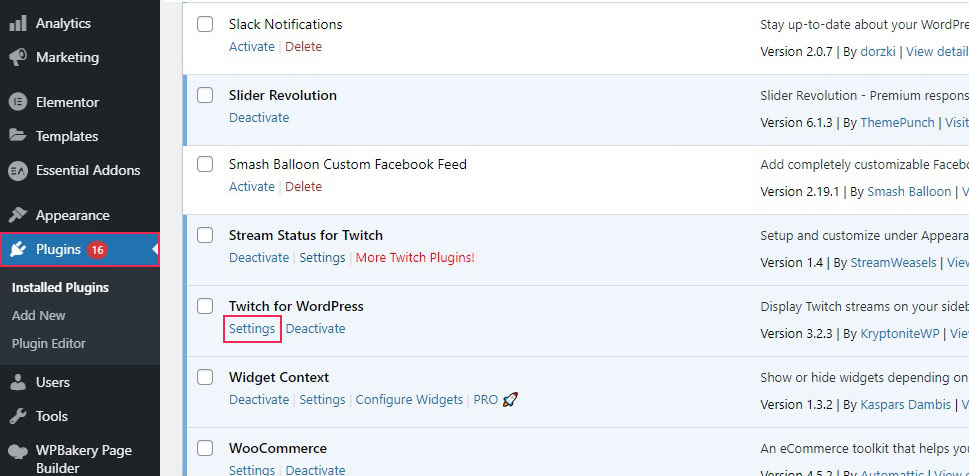
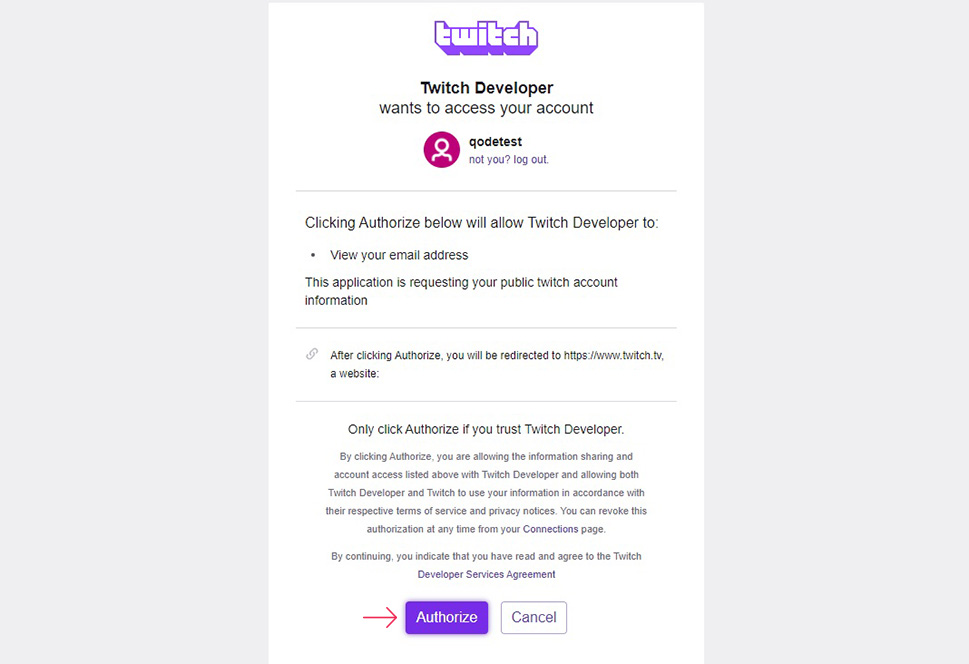
While logged into your Twitch account, go to the Twitch Developers site. You will need to Authorize Twitch Developer to access your account.
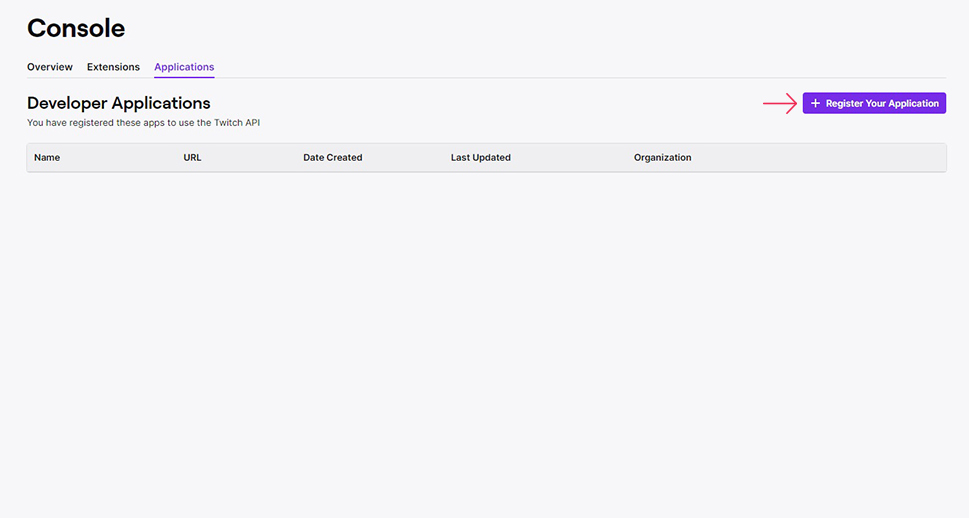
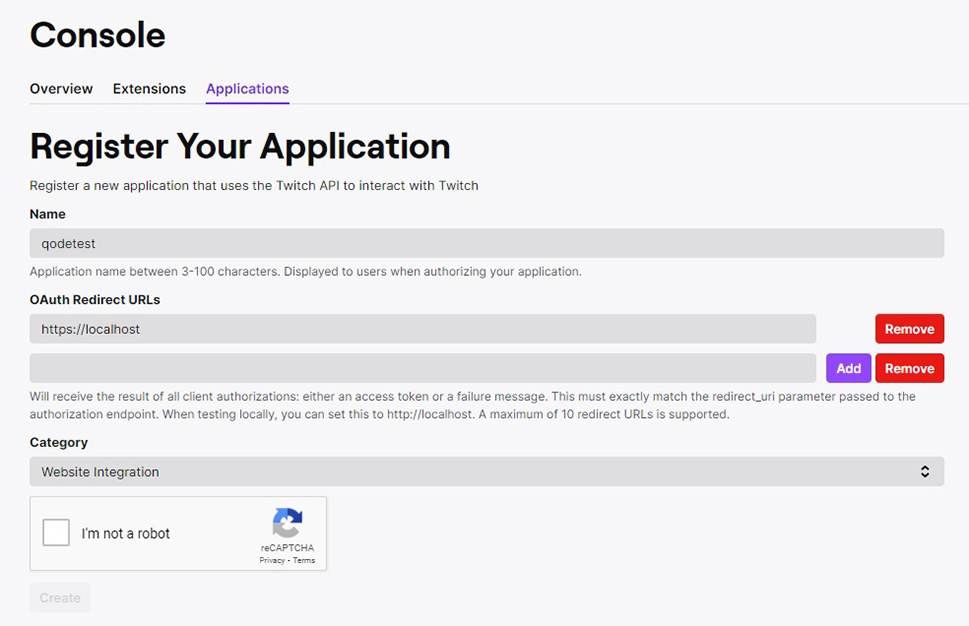
You will then be taken to your account‘s console. Find the Applications tab and click the button on the right-hand side to +Register Your Application.
You then need to choose a Name for your application, enter and Add a valid redirect link for your OAuth Redirect URL (for the purposes of testing, we have used https://localhost), and select Website Integration for your application Category. Check the reCAPTCHA and then click Create.
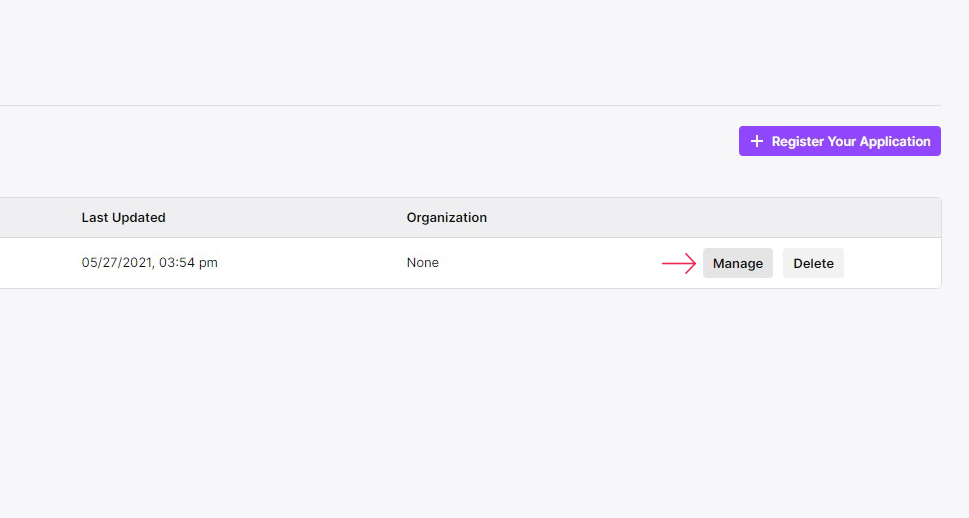
Once you have created your application, click on the Manage button.
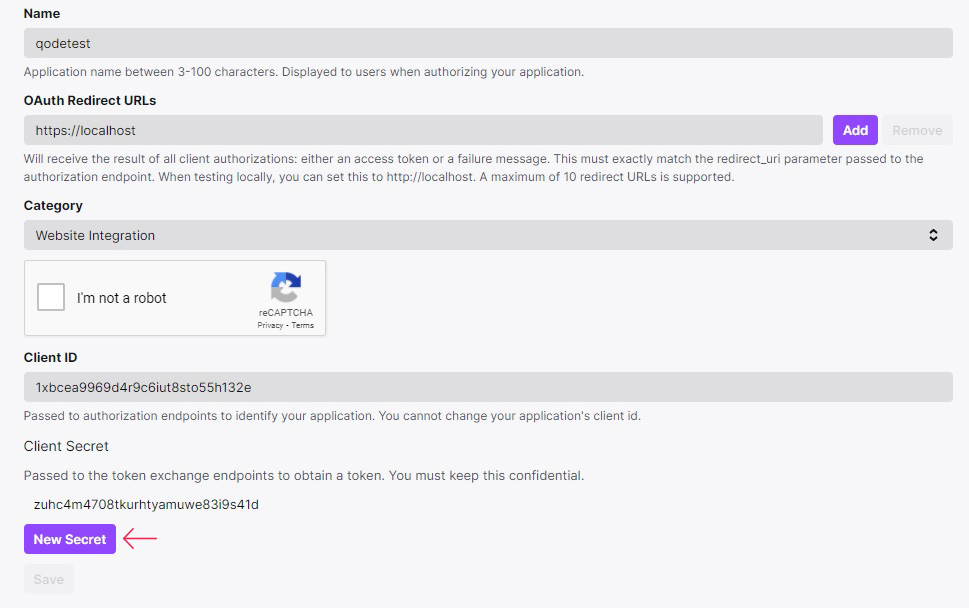
Finally, we arrive at the two things we need: your Client ID and your Client Secret. Click to get your New Secret.
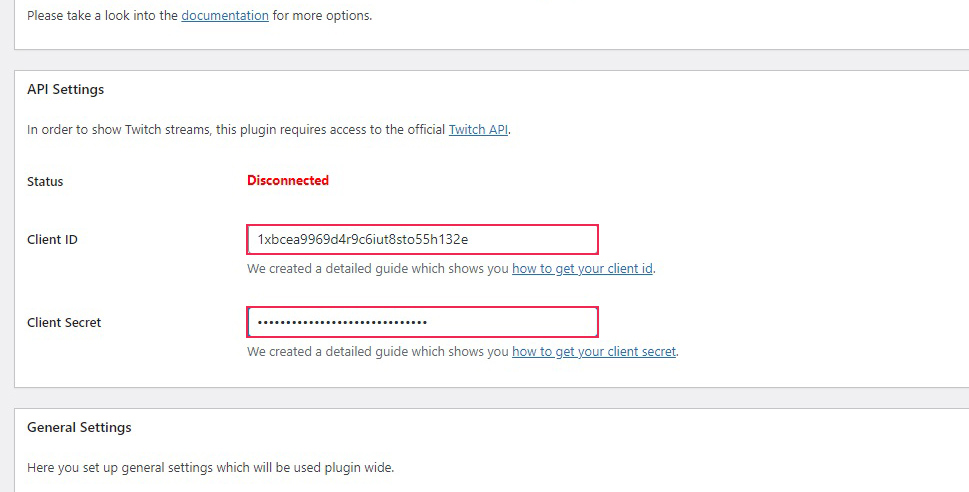
Paste your Client ID and your Client Secret into their fields in the API Settings sections and hit enter. Your API Status will change to Connected.
Scrolling down, you will find the plugin‘s General Settings. These include the Cache Duration setting (for how long does the plugin store temporary files; keep low for best performance), and the No Streams message settings, governing whether the user sees the message when no streams are available and what the message itself is.
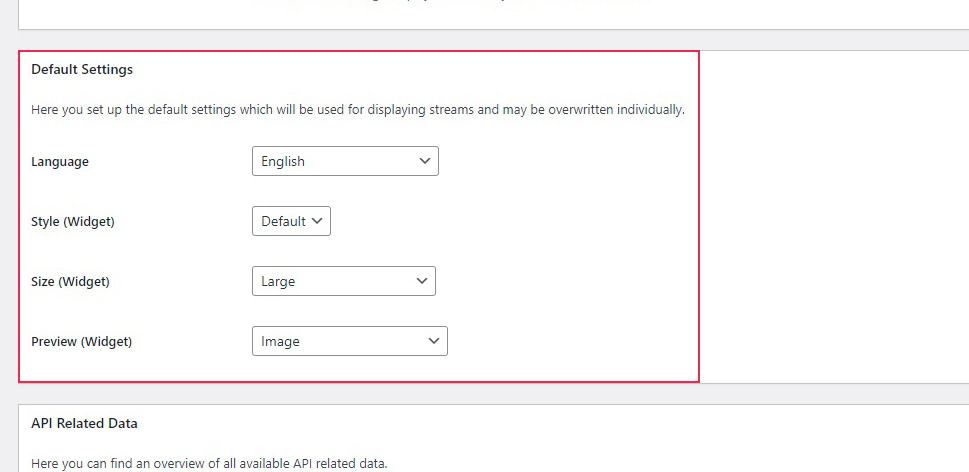
Further down are the Default Settings, which contain the Language filter (you have to select a language in which to show streams), as well as Widget and Preview Style. The free version of this plugin doesn‘t give us a great deal of options here, so we‘ll leave all of these settings alone.
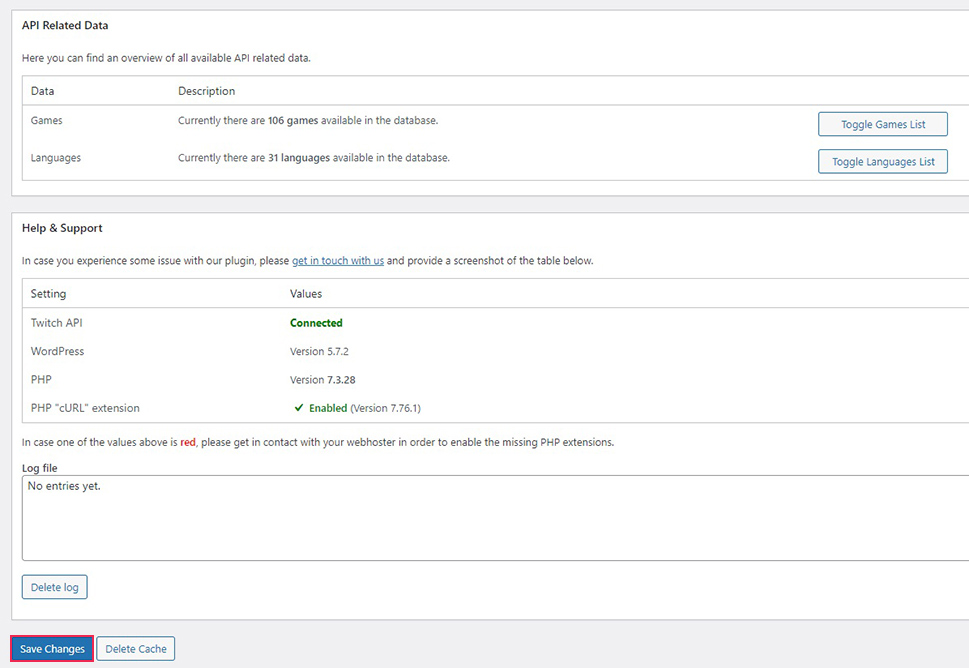
Further down, you can review your API data and stream availability, and click Save Changes.
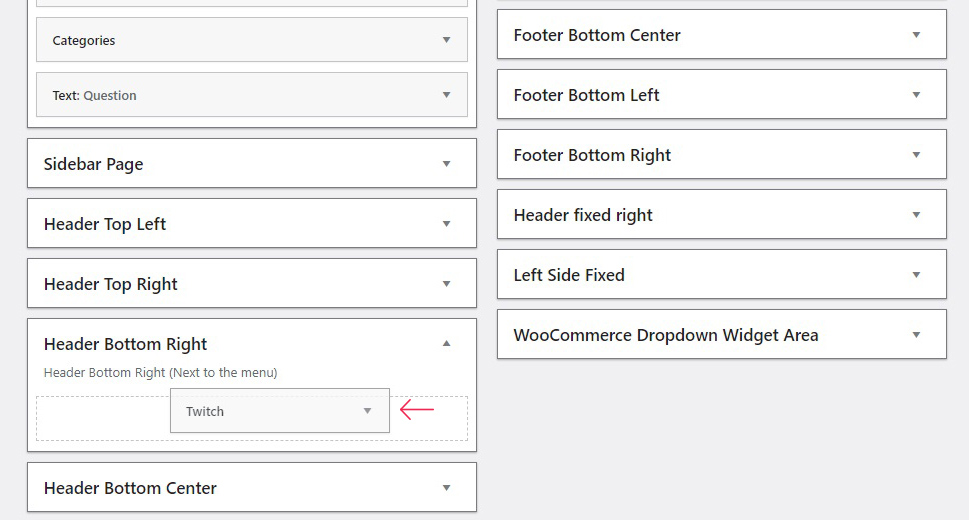
Now, to actually place your stream widget onto your website, you need to navigate to Appearance/Widgets on your WordPress dashboard and drag the Twitch Widget to the desired area. Bear in mind that widget area names and positions vary by theme.
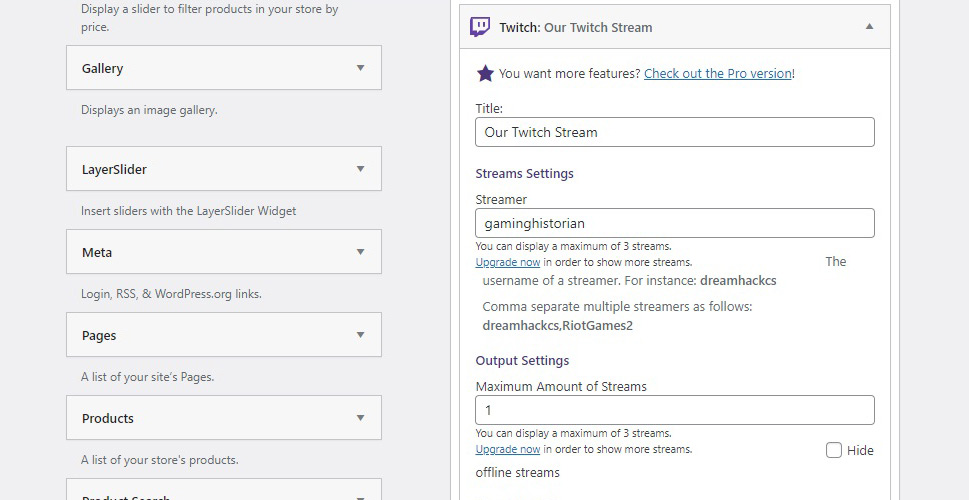
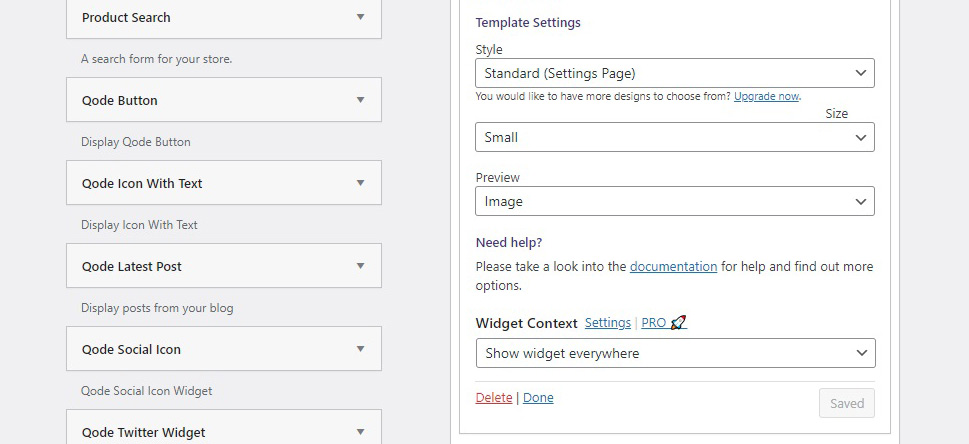
Once you have your widget in place, you need to configure it. Your stream may have a Title, but it’s not compulsory. The free version allows you up to three streams, but we will link just the one. Enter the Streamers you wish to feature as a comma separated list. The Output Settings allow you to specify the number of streams which to feature (again, we went with one). The Template Settings let you choose between the Style from your settings page or other settings (available in the pro version only), choose the Size (we went with small, because otherwise the widget would take up the width of the screen), and the Preview. We went with Image, but you can choose a video preview if you like. The Widget Context menu allows you to choose when the widget is shown. Once you are satisfied with your settings, click Save.
And finally, your stream will be there for your visitors to enjoy.

In Conclusion
As you have seen, making your presence on Twitch known is no big deal, while embedding a stream does take some little effort. Whether you like it or not, Twitch is an indispensable tool for distribution of gaming-related content. If your website is in any way related to games, you can‘t afford not to be aware of it.


